Deploy a Full-Stack Application on AWS Step by Step
Embarking on the journey of deploying your full-stack web application can feel daunting, especially when considering cloud platforms like Amazon Web Services (AWS). However, with a structured approach and clear guidance, it becomes an achievable and incredibly rewarding process. This guide is designed to be your compass, leading you through the essential steps to get your application live and running on AWS, catering to both beginners and those looking for a refresher.
Why Deploy Your Full-Stack App on AWS?
AWS offers a robust, scalable, and reliable infrastructure that can support applications of all sizes. Its vast array of services allows you to tailor your deployment precisely to your needs, from simple static websites to complex, microservices-based architectures. Benefits include:
- Scalability: Easily scale your resources up or down based on demand.
- Reliability: Benefit from AWS’s global infrastructure and high availability.
- Cost-Effectiveness: Pay only for what you use with flexible pricing models.
- Security: Leverage AWS’s comprehensive security features.
- Managed Services: Reduce operational overhead with managed databases, load balancers, and more.
Prerequisites for Deployment
Before we dive into the deployment steps, ensure you have the following in place:
- An AWS Account: Sign up for a free tier account if you don’t have one.
- Your Full-Stack Application Code: Ensure your frontend, backend, and database are ready.
- Basic Understanding of Git: For version control and deployment pipelines.
- Familiarity with your chosen technologies: e.g., Node.js, React, Python, PostgreSQL, etc.
Step 1: Setting Up Your AWS Environment
The first step is to get your AWS environment organized. This involves creating a project structure and setting up necessary permissions.
1.1 Create an IAM User
For security best practices, avoid using your root AWS account for everyday operations. Instead, create an IAM (Identity and Access Management) user with appropriate permissions.
- Navigate to the IAM console.
- Click “Add user”.
- Provide a username and select “Programmatic access” and “AWS Management Console access”.
- Attach policies: For this guide, we’ll grant broad access, but in production, you should grant only necessary permissions (principle of least privilege). Consider policies like “AdministratorAccess” for initial setup.
- Create an access key ID and secret access key. Store these securely; you’ll need them to authenticate your AWS CLI.
1.2 Configure AWS CLI
The AWS Command Line Interface (CLI) is essential for interacting with AWS services from your local machine.
- Download and install the AWS CLI for your operating system.
- Open your terminal or command prompt and run
aws configure. - Enter your Access Key ID, Secret Access Key, default region name (e.g.,
us-east-1), and default output format (e.g.,json).
Step 2: Deploying Your Backend
Your backend application typically handles business logic, API requests, and database interactions. We’ll explore deploying it using AWS Elastic Beanstalk, a service that simplifies deployment and management.
2.1 Prepare Your Backend for Deployment
Ensure your backend application is configured to run on a server. This often involves:
- Creating a production build.
- Setting up environment variables for database credentials, API keys, etc.
- Configuring your application to listen on the port provided by Elastic Beanstalk (usually
PORTenvironment variable).
2.2 Create an Elastic Beanstalk Application
Elastic Beanstalk abstracts away much of the underlying infrastructure, allowing you to focus on your code.
- Navigate to the Elastic Beanstalk console.
- Click “Create new application”.
- Enter an application name (e.g.,
my-fullstack-app-backend). - Choose a platform: Select the environment that matches your backend language (e.g., Node.js, Python, Java).
- Upload your code: You can upload a ZIP file of your backend code or connect it to a code repository. For this example, we’ll upload a ZIP.
- Configure environment: Choose “Web server environment”.
- Review and create. Elastic Beanstalk will provision the necessary AWS resources (EC2 instances, load balancer, etc.) and deploy your application.
2.3 Database Setup (RDS)
Your backend will likely need a database. AWS Relational Database Service (RDS) offers managed database solutions.
- Navigate to the RDS console.
- Click “Create database”.
- Choose “Standard create” and select your preferred database engine (e.g., PostgreSQL, MySQL).
- Select a template (e.g., “Free tier” for testing).
- Configure your database instance: Set an identifier, master username, and password.
- Crucially, configure network settings. In “VPC security groups”, create a new one or select an existing one that allows inbound traffic from your Elastic Beanstalk environment. For simplicity during initial setup, you might temporarily allow access from your IP address, but this is not recommended for production.
- Click “Create database”.
- Once created, retrieve the database endpoint, username, and password. You’ll need these for your backend application’s environment variables.
Important: Update your backend application’s configuration to use the RDS database endpoint and credentials. You might need to redeploy your Elastic Beanstalk application after making these changes.
Step 3: Deploying Your Frontend
Your frontend application (e.g., React, Vue, Angular) needs to be hosted where users can access it. Amazon S3 with CloudFront is an excellent and cost-effective solution for static site hosting.
3.1 Prepare Your Frontend for Deployment
Generate a production build of your frontend application. This typically results in static HTML, CSS, and JavaScript files.
- Run your frontend build command (e.g.,
npm run buildoryarn build).
3.2 Create an S3 Bucket
Amazon Simple Storage Service (S3) is used to store your static frontend files.
- Navigate to the S3 console.
- Click “Create bucket”.
- Enter a unique bucket name (e.g.,
my-fullstack-app-frontend-bucket). - Choose your AWS Region.
- Crucially, for static website hosting, you need to disable “Block all public access”. Be aware of the security implications and configure bucket policies accordingly.
- Click “Create bucket”.
3.3 Upload Your Frontend Build to S3
Upload the contents of your frontend’s build folder (e.g., the build or dist directory) to your S3 bucket.
- Select your bucket and click “Upload”.
- Drag and drop your build files or select them manually.
- Click “Upload”.
3.4 Configure S3 Bucket for Static Website Hosting
Tell S3 to serve your files as a website.
- Go to your S3 bucket’s “Properties” tab.
- Scroll down to “Static website hosting” and click “Edit”.
- Enable static website hosting.
- Enter your index document (usually
index.html) and optionally an error document (e.g.,index.htmlor a custom error page). - Save changes.
You will now see a “Bucket website endpoint” URL. This is the direct URL to your frontend, but it’s not yet secure or performant.
3.5 Configure CloudFront for Content Delivery
CloudFront is AWS’s Content Delivery Network (CDN). It caches your frontend content at edge locations globally, improving performance and providing HTTPS.
- Navigate to the CloudFront console.
- Click “Create distribution”.
- Origin domain: Select your S3 bucket from the dropdown.
- Origin access: Choose “Origin access control settings (recommended)” and create a new OAC. Follow the prompts to grant CloudFront permission to access your S3 bucket.
- Viewer protocol policy: Redirect HTTP to HTTPS.
- Allowed HTTP methods: GET, HEAD.
- Configure cache behavior, price class, and other settings as needed.
- Click “Create distribution”.
It will take some time for the distribution to deploy. Once active, you’ll get a CloudFront domain name (e.g., d123abc456def.cloudfront.net). This is the URL you will use to access your frontend.
Step 4: Connecting Frontend and Backend
Your frontend needs to know how to communicate with your backend API.
- Backend API Endpoint: Identify the URL of your deployed backend application. If using Elastic Beanstalk, it will be the environment URL provided by the service.
- Frontend Configuration: Update your frontend application’s configuration to point to your backend API endpoint. This is typically done by setting an environment variable (e.g.,
REACT_APP_API_URL) that your frontend code reads. - CORS (Cross-Origin Resource Sharing): Ensure your backend application is configured to handle CORS requests from your frontend’s domain. If your frontend and backend are on different subdomains or domains, you’ll need to enable CORS. Most backend frameworks have middleware or plugins for this.
- Redeploy Frontend and Backend: After making these configuration changes, redeploy both your frontend and backend applications to reflect the updates.
Step 5: Domain Name and SSL/TLS
A custom domain name and HTTPS are essential for a professional application.
5.1 Register a Domain Name
If you don’t have a domain name, you can register one through Amazon Route 53 or other domain registrars.
- Navigate to the Route 53 console.
- Go to “Registered domains” and click “Register domain”.
- Follow the prompts to search for and purchase your desired domain.
5.2 Configure DNS Records
You’ll use Route 53 to point your domain to your CloudFront distribution (for frontend) and potentially to your Elastic Beanstalk environment (though it’s better to use a load balancer or API Gateway for the backend).
- Go to your domain’s “Hosted zones” in Route 53.
- For Frontend (CloudFront): Create an “A” record and choose “Alias” to “Alias to CloudFront distribution”. Select your CloudFront distribution from the dropdown.
- For Backend (Optional, but Recommended): You might want to set up an API Gateway or Application Load Balancer in front of your Elastic Beanstalk environment to handle SSL termination and provide a stable API endpoint. For simplicity in this beginner guide, we’ll assume direct access to the Elastic Beanstalk URL, but for production, this is not ideal. If you want a custom subdomain for your API, you’d create another “A” record in Route 53, aliased to your Elastic Beanstalk environment’s CNAME or Load Balancer DNS.
5.3 Obtain and Configure an SSL/TLS Certificate
AWS Certificate Manager (ACM) makes obtaining and managing SSL/TLS certificates easy.
- Navigate to the AWS Certificate Manager (ACM) console.
- Request a public certificate.
- Enter your domain name (e.g.,
yourdomain.com) and any subdomains (e.g.,api.yourdomain.com). - Choose validation method (DNS validation is recommended).
- Follow the instructions to create DNS records in Route 53 to validate your domain ownership.
- Once issued, associate this certificate with your CloudFront distribution and potentially your Load Balancer or API Gateway.
For CloudFront, you specify the custom SSL certificate in your distribution’s “General” settings under “Custom SSL certificate”.
Step 6: CI/CD Pipeline (Optional but Recommended)
A Continuous Integration/Continuous Deployment (CI/CD) pipeline automates the build, test, and deployment process whenever you push changes to your code repository.
6.1 AWS CodePipeline, CodeBuild, and CodeDeploy
These AWS services can be integrated to create a robust CI/CD pipeline.
- CodeCommit/GitHub/Bitbucket: Your source code repository.
- CodeBuild: Compiles source code, runs tests, and produces software packages (e.g., Docker images or ZIP files).
- CodeDeploy: Automates code deployments to various compute services like EC2, ECS, and Lambda.
- CodePipeline: Orchestrates the entire workflow, connecting the source repository, build, and deployment stages.
Setting up a full CI/CD pipeline involves detailed configuration for each service, including defining build specifications and deployment strategies. This is a more advanced topic, but it’s crucial for efficient and reliable deployments in the long run.
Frequently Asked Questions (FAQ)
What is the difference between EC2 and Elastic Beanstalk?
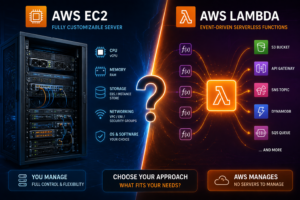
EC2 (Elastic Compute Cloud) provides raw virtual servers (instances) where you have full control over the operating system and installed software. Elastic Beanstalk is a higher-level service that abstracts away much of the infrastructure management, automating deployment, scaling, and monitoring for web applications.
How do I handle sensitive information like database passwords?
Never hardcode sensitive information in your code. Use environment variables. For more secure management of secrets, consider using AWS Secrets Manager or AWS Systems Manager Parameter Store.
Can I use a NoSQL database like DynamoDB with my application?
Yes, AWS offers DynamoDB, a fully managed NoSQL database service. You can integrate it into your backend application similarly to how you would integrate an RDS database.
What if my application needs to run multiple instances for high availability?
Elastic Beanstalk automatically manages this with Auto Scaling Groups. You can configure scaling policies based on metrics like CPU utilization or network traffic.
How do I monitor my application’s performance and health?
AWS provides CloudWatch for monitoring metrics, logs, and setting up alarms. Elastic Beanstalk also offers built-in monitoring dashboards.
Conclusion
Deploying a full-stack application on AWS might seem complex initially, but by breaking it down into manageable steps, you can successfully launch your project. We’ve covered setting up your AWS environment, deploying your backend with Elastic Beanstalk and RDS, hosting your frontend with S3 and CloudFront, integrating a custom domain and SSL, and touched upon CI/CD. Remember to prioritize security, leverage managed services, and continuously learn and optimize your deployment strategy as your application grows. This guide provides a solid foundation for your AWS deployment journey.